So the 2015 Minions movie is finally here and what better way to celebrate the release of these cuties with a 3D perler bead project! This is my first 3D project using perler beads and man does it take a lot of patience, dedication and creativity! It took me more than 3 hours to figure out the entire design for this Minion and it happened to turn out to be Kevin because I made a few more layers of rings than I needed if I were to make Dave. Oh well, he's still awesome looking to me and I hope you will make a Minion that turns out as well as mine did. :)
In order to figure out how to make your Minion, just follow these steps and designs that I have organized for you to make things a lot easier!
Making Minion Kevin
-1 Small 15 Diameter Circular Pegboard
-1 Small Square Pegboard or Large Pegboard (Doesn't matter)
-Dimension Reach For Minion Body: 11 perler beads at most
-Time: Approx. 2-3 hours :) Patience is key to your success with this project
Colours (I'm not counting them all 0.0):
-DARK BLUE
-YELLOW
-WHITE
-GRAY
-BLACK
-ANY OTHER COLOUR (preferably one you don't need too much for other projects)
Circle pegboard is needed.
Minion Feet
All pieces needed for two feet
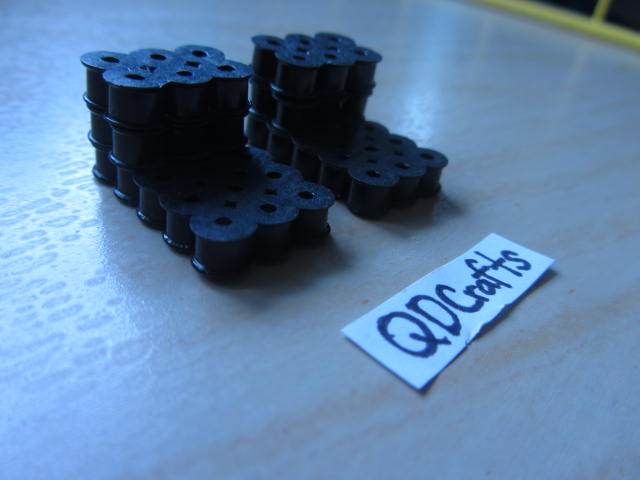
As you can see from this image, you will need FOUR 2x3 black rectangles and TWO 5x3 black rectangles to make the minion's feet. First, glue two pairs of 2x3 pieces together. It should look like this:
Then, glue each stack of 2x3 rectangles onto the 5x3 rectangle:
You're now done the feet!
Minion Eyes/Goggles
Minion Arms
These will be glued to the sides of you minion.
Minion Body
This is what you should have after reading/following all the instructions. The circles that you see lying flat on the table are NOT TO BE GLUED on top of anything. The yellow part with the smile is glued on top of the blue overalls, the cap is placed (NOT GLUED) on top of the piece with the smile and the yellow and black piece is glued on top of the cap. Lastly, the little cap above the black and yellow piece is not glued, but can fit perfectly in the piece below it as a cap for opening and closing.
FIRST QUARTER
These are all the pieces for the first quarter of the minion. The left picture is the bottom of the minion and the right picture shows the pieces that go on top of the solid circle. Note that the inner ring of clear beads can be any other bead colour you want since it will not be seen! Most of the rings will have a diameter of 11 perler beads or just make a circle starting 3 spaces from the edge of the pegboard.
Piece 1
Pieces 2,3,4 & 5
Once you glue them in order with piece #1 at the bottom with pieces #2,3,4,5 following, it should look like this.
SECOND QUARTER
Pieces 6 & 7
Pieces 8 & 9
This will start creating the strap of the overalls on your 3D minion! Glue these pieces together first.
Piece 10
Then glue these together as well.
And this will be the final piece that completes the overall strap that will be going on top of all the previous pieces.
Pieces 6&7 (glued), 8&9 (glued) & 10
The straps of the overalls should look like this.
You should now have three pieces in total for the second quarter after gluing. The first two pieces in the left picture are pieces 6&7 and pieces 8&9 glued together, respectively. Now you must stack the pieces in the order seen in the left picture and your final result for the second quarter is shown in the right picture. Make sure this is how the dark blue perler beads are aligned.
FIRST HALF DONE!
Stack the second quarter on top of the first quarter! The part with the two extra rows of dark blue perler beads is the front of the minion's body.
THIRD QUARTER
Pieces 11 & 12
This will make the minion's smile. Stack and glue them together following the order shown in the picture.
It should look like this! See, it's a little smile :)
From left to right, top to bottom: Pieces 13,14,15,16,17 & 18
To make the 2 smaller rings, you have to make an irregular circle by following this design.
That means when you iron, you have to iron it slightly first and when you turn over the ironing paper, you must try your best to push the two end points of the broken ring together so that they will join and become a circle. Don't understand? This is better seen in my video which is shown below.
LOOK AT THIS PICTURE AGAIN
THIS IS WHAT IT SHOULD LOOK LIKE AFTER GLUING
Close up of the last piece. This is the cap that will let you open your piggy bank.
IMPORTANT NOTE: You will glue pieces 13,14,15 together and 16,17,18 together, but DO NOT GLUE the (13,14,15) piece together with the (16,17,18) piece. Check video for more clarity.
FOURTH QUARTER
Piece 19 & 20
This is the minion's goggle strap. Note that the inner green ring can be any colour you want. It won't be seen so it doesn't matter what colour you choose. Glue these two pieces together!
Again, follow the order from left to right, top to bottom: pieces 21,22,23,24,25,26
From the above image, glue pieces 21,22,23 on top of each other and then glue piece 24 on top of that. Here is a closeup of piece 24 that shows you the diameter.
This is 4 beads away from the edge of the pegboard and has a diameter of 9 perler beads.
Piece 25 looks like this. Make sure it is only one layer of perler beads. It is 4 perler beads away from the edge and has a diameter of 7 perler beads.
This is piece 26. It is the top cap of the minion's head. Like piece 16 & 17, you have to make an incomplete circle and then manually fuse them together. Don't forget to fill in the middle with 3 extra yellow beads while leaving a small slot in the cap. Check the video because this can be difficult to achieve.
Try your best with this part and watch my video to see how I did it. It's better to watch than to read for this case. :)
Minion Hair
Follow this pattern to make the hair piece that will fit in the hole of the cap.
FINAL ASSEMBLY
After gluing everything, this is what it should look like. REMEMBER. Don't glue the caps on or else you can't open your piggy bank minion!
If you are not sure exactly how to assemble this, see how to do it here:
This is another common form that you see Kirby in! His sparks are just like the fire that is seen in my previous Fire Kirby post and he has a cool lime green colour too. Here are the beads you'll need to make it:
Making Spark Kirby:
-1 Regular 29x29 Pegboard
-Dimension Reach: 21 x 28
-Time: Approx. 30 minutes
Colours:
81---Black
22---Brown
6---Red
32---Butterscotch
14---Cheddar
15---Yellow
31---Green
87---Kiwi Lime
47---Pastel Green
65---Parrot Green
11---Translucent Green
3---Light Blue
3---Turquoise
6---Dark Blue
29---Toothpaste
29---White
As I have mentioned before in my first Kirby post, I love the Kirby Squeak Squad game as well as Super Star Ultra and one of my favourite Kirby fighters is Fire Kirby!!! Like my Ice Kirby, this one has a head band with a square "gem" on it, but this time it's green and accompanied with a wonderful display of perler bead fire! This one is in the difficult/hard category because that fire took a long time to get just right. Up close, it may not seem very dimensional, but back up a bit, and your eyes will light up :). Of course with this Kirby, there is the classic pink body, so make sure you have a lot of reds and pinks for this project!
This perler Kirby is about the size of my hand, so it is pretty big and will take up most of the board. These big perler bead creations may be hard to iron, so be careful and make sure every part of Fire Kirby gets an equally distributed amount of heat! You don't want him to be too hot. See Fire Kirby come together in this video:
The first Kirby game I ever got was Kirby Squeak Squad for Nintendo DS. It was one of my first Nintendo games that I played (first one Mario Kart DS of course) and I still love playing it time to time, especially with my much larger 3DS XL screen. I remembered one of my favourite forms of Kirby was Ice, because it turned enemies into ice cubes XD, so that's what inspired me to make this, the first moderately difficult perler beads sprite that took up a lot of the pegboard. Enjoy!
Making Ice Kirby:
-1 Regular 29x29 Pegboard
-Dimension Reach: 21 x 28
-Time: Approx. 30 minutes
Colours:
32---Black
27---Light Brown
9---Tan
72---Dark Blue
65---Light Blue
50---Turquoise
104---Toothpaste
18---Plum
8---Pastel Lavender
11---Light Pink
7---Yellow
3---Butterscotch
10---Cheddar
25---White
Total: 441 Beads
This Ice Kirby is about the size of my entire hand, so it will take some time to complete and if you want to make changes, squinting a lot will probably be needed in order to see if the ice "pops" out and looks like it has some dimension. See it come together!